
No component of your PC is more vulnerable to heat than your graphics card. Even relatively affordable midrange cards sport complex graphics processing units that consume a lot of power and pump out quite a bit of heat. But if you take the time to refurbish your graphics card safely, you may be surprised to see it running like new—or in some cases, better than new.
Tools of the trade
To start, you need a few tools and a bit of know-how. Generally you need a screwdriver (or two) to help with the disassembly, plus cleaning materials such as canned air, alcohol, and cotton swabs. You want a small brush to wipe away dust and old thermal interface material, and some replacement thermal paste.I’m using a Radeon HD 5870 graphics card for this project, a decent GPU that’s a few years old at this point. (Although your card may be different, the instructions that follow should work with appropriate adjustments.) This ATI card uses three different sizes of Phillips-head screws to secure its case bracket, heat sink, and fan shroud, and it features an additional heat/reinforcement plate on the back.
Its barrel-shaped fan and relatively long heat sink—with densely packed fins—are prone to dust buildup. Plus, since this was a powerful GPU in its time, it can get really hot when playing games.
When it was brand-new, this card’s GPU temperature usually hit around 172 degrees Fahrenheit (78 degrees Celsius) under load. But since it has gotten so dusty and dirty, it’s reaching temps closer to 185 degrees Fahrenheit (85 degrees Celsius) now. The card’s fan is not only louder, but it also spins up more quickly and more frequently—working overtime to manage the heat.
The disassembly
To clean and refurbish the card, you first need to disassemble it. Begin by removing the screws holding the card’s rear heat/reinforcement plate in place. Next, remove the two smaller screws that secure the case bracket to the fan shroud. Finally, remove four even smaller screws that hold a spring-loaded heat sink mount.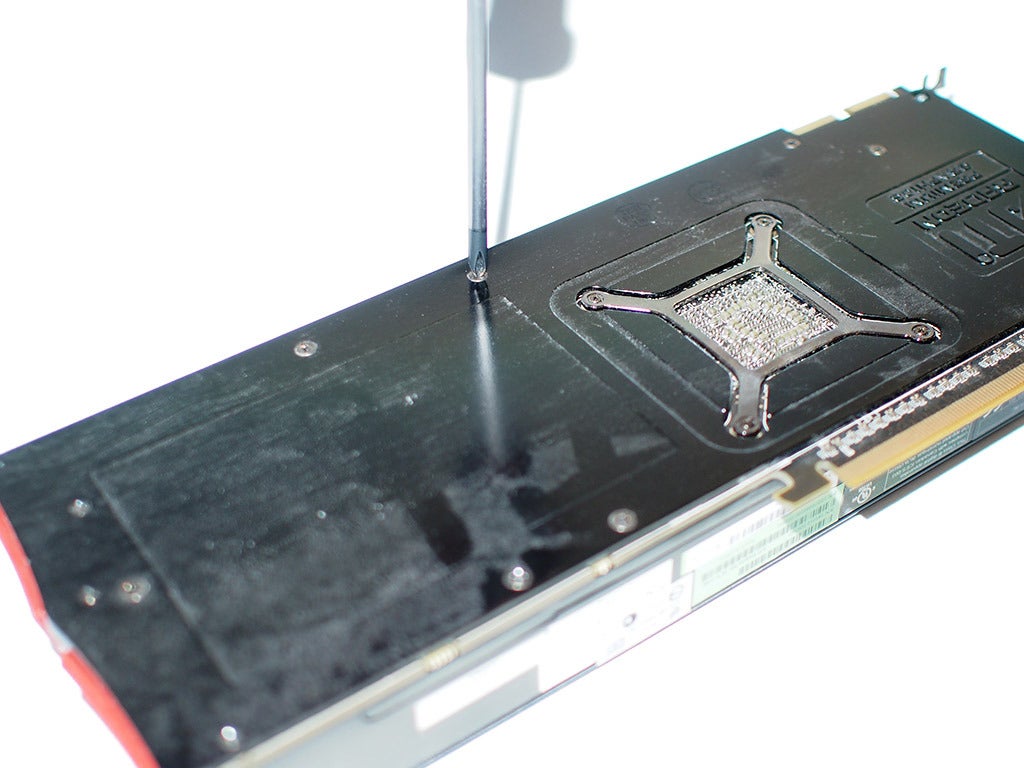
Be especially careful when pulling the card apart so as to not damage any surface-mounted components or the thermal pads themselves. I gently pried the reinforcement plate off the card, using steady, even pressure. I then did the same for the fan shroud and the heat sink. After pulling off the shroud, I also had to unplug the cooling fan from a port on the PCB.

I used canned air and a small brush to remove the gunk from the cooling-fan heat sink. With cotton swabs and a small amount of alcohol, I cleaned the older thermal paste from the GPU and the base of the heat sink.
We can rebuild him
After cleaning the graphics card’s heat sink and fan, and removing its subpar thermal paste, I reapplied fresh thermal paste and put the card back together. I also took a couple of additional steps to make sure that the card’s cooler would perform at its peak.

Don’t forget a fresh coat of software
Now that you’ve cleaned and reassembled the graphics card, it’s ready to go back into your machine. But don’t forget the software! Download new drivers while you’re thinking about it.Though flashing a newer vBIOS on an older card is not usually necessary, doing so can help to increase its performance, as was the case when AMD introduced Boost on the Radeon HD 7950. A new vBIOS can also enhance your card’s stability or fix compatibility issues, as was the case with a recent vBIOS update for GeForce GTX Titan cards that enhanced their compatibility with tiled 4K displays.

Source : PCWorld
Image : TechHive


No comments