 |
| Microsoft stopped support Windows XP |
Most are aware that Microsoft is soon going to end supports for Windows XP and Office 2003. There won’t be any support options, bug fixes or security updates for these Microsoft products after April 8, 2014. If you have not yet started the migration to a modern operating system, you might want to take a call on it. ‘The end of life’ is the phrase used by mark the end of automatic fixes, updates, or online technical assistance for the Windows XP System.
Press "windows" + r to open Run and type regedit to open Registry.
 |
| regedit |
Naviagate to :
 |
| HKEY_CLASSES_ROOT \ Drive \ Shell |
HKEY_CLASSES_ROOT \ Drive \ Shell
Right click on the Shell key and create a newkey and name it runas
Right-click the default key and select Edit Value, type in the Data section Defrag and confirm with OK.
Right on key runas, created in the first step, and create a new / given key name command
Right on the default key Information section and select Edit Value, type defrag% 1-v Confirm with OK.
Exit Registry and restart.
 |
| SLIMDRIVER |
Step by Step process:
Step: 1
Step: 2
Now open the Slimdriver from windows start button and click on START SCAN the software will check the hardware components and it will search for the latest hardware drivers from the manufactures website
 |
| step 2 |
Step: 3
Now the SlimDriver will list the all available hardware updates according to the hardware category now click on download update corresponding to each driver update the Slimdriver will automatically download the update from the official site
it is preferred to create a restore point( a dialogue box will appear) and then reboot your system after installing hardware update.

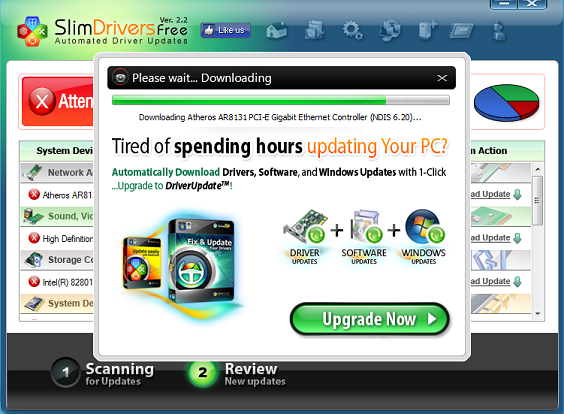
SlimDriver will be a very hand tool for those who use laptops ,where there is need to update WiFi,Bluetooth , Graphic , USB , webcams drivers it is the leading software tool under update category in CNET , Brothersoft , Softonic and many other sites .It is a free tool so our recommendation is to give it a try and see the result.
 |
| Windows 8 USB Recovery Drive |
- You should check if there is already Recovery partition present on your computer, Because to create a USB recovery drive there should be a recovery image present on your computer.So to check for the recovery image on your computer.
- Open Command Prompt with Administrator rights.(Search for Command in start menu, Right click on command prompt and hit on "Run as Administrator")
Now enter this command on your command prompt recimg /showcurrent and hit enter.As shown in below screen shot.


After entering these two commends you will be able to see the process of creating recovery image on your computer as shown in screenshot below.You can delete the recovery image from your computer to save the memory after completing of creating the USB Recovery drive.
- mkdir C:\RefreshImage and hit enter
- recimg -CreateImage C:\RefreshImage and hit enter

Creating Windows 8 USB Recovery Drive
To create a recovery drive search for the "recovery drive' in windows search. and click on Create a recovery Drive. (Note you must have administrator rights, it might ask you password.)
- When the tool is opened check the box to Copy the recovery partition from the PC to the recovery drive. And hit Next
- Now Insert the USB drive into USB port, make sure that there is no information stored on your USB, as the recovery tool will completely wipe out the data stored on USB.
- And then select the usb from the list of available USB drives for storing the recovery image.And Hit next.And then Hit on Create.
- That's it! You have created Windows 8 Recovery image.You can now use that to refresh and reset your windows 8 computer.
- If you want to store the recovery image on your computer then you can hit on "Finish" or if you want to save the space you can delete the recovery image by hitting on "Delete".
- After everything is done you can remove the USB from your computer.
Source & Image : alltechtricks.com
PC’s performance will slow down at 3 Instances:
- At the time of BOOTING
- During normally usage.
- While Shutting Down.
Tips to Speed Up Windows Performance:
Use a Good Antivirus:
If you are not using a Good antivirus then the chances for your PC getting infected are pretty high.In this present world of Internet nothing is safe online.As windows is the most widely used operating system,many new viruses/trojans are created daily to exploit windows os.
Removing unwanted Startup Applications:
Sometimes even after the pc starts, few programs keeps on loading thereby stopping you from performing your operations.In some cases, you might come across a strange WINDOWS error known as “Blue Screen Of death”.To avoid this you have to limit the number of startup programs.Lesser the number of startup programs greater will be the pc startup speed.
- Press” Windows key + R”(shortcut key for RUN)
- A RUN box will open .Type “Msconfig” (without quotes) in the RUN box and hit ENTER. It will take you to the “system configuration”.

- Select “START UP” from the Tab’s at the top and uncheck all the unwanted programs that you don’t want to get started along with startup. Now click “OK” and then “APPLY”.Restart the pc you will definiately notice an improvement in startup and booting speed.
Delete all the Temporary files and folders:
Windows stores some temporary files which are created while you are running any sort or applications. Deleting those Temporary files will helps you to increase your PC Performance during normal usage. Follow the steps below to delete the temporary files
- Press” Windows key + R”.
- In the RUN box type “%temp%” (without quotes) and hit enter.
 |
| Temporary Files and Folders |
- It will take you to a Folder where all the Temporary files are stored. Select and delete all the files. You may not delete all the files there, just skip those files which are undeletable.
Disk Clean Up:

Disk cleaning will delete all your temporary files from any drive of your Disk. Here is the Procedure
Press” Windows key + R”.
Type “cleanmgr” (without Quotes) and hit enter.
Select the particular Disk that you want to Clean and click on “OK” and now you can delete all the temporary files. Repeat the same procedure for all the drives and it will really free some amount of memory in every drive.
Defragment Disk:
For Defragmenting the Disk follow the steps below:
1. Right click on any drive and select PROPERTIES
2. Click on TOOLS and select DEFRAGMENT NOW
3. ANALYSE the dick first and then DEFRAGMENT it.
Delete ”Old Windows” Files:
Normally your files of OLD version of windows can be removed easily using DISK CLEAN UP. So you can follow the same procedure to delete the files of OLD WINDOWS
Reduce Files on Desktop
Move all the files on your Desktop to any other separate drive.Every shorcut on desktop consumes 20kb of your RAM.If there are too many shortcuts then it is definitely going to effect the performance speed of your computer.You can use shortcuts on the desktop for easy navigation (Shortcuts are less in memory).
Using Proper Cooling System:

Make sure that your Cooling fans are working fine. Try to clean the Dust from the surface of the fans to make it work properly. Provide good ventilation for PC’s and try to maintain the room cool so that Pc can perform better.
Removing Visual Effects:
Follow the steps below to disable unwanted Visual effects
1. Go to CONTROL PANEL > SYSTEM AND SECURITY > SYSTEM >ADVANCED SYSTEM SETTINGS ( A box will pop up)
2. Click on SETTINGS of PERFORMANCE section.
3. There check all the visual effects and remove those which are not need for your and save those settings
Deleting Internet Cache
There are many software’s available on internet to Delete internet cache but, CC Cleaner is the free software and its very effect in deleting the file temporary files.
Use Revo Uninstaller to uninstall programs:
Completely uninstall programs and applications using a program like Revo Uninstaller.
There are many Good software’s available on internet to fix all your registry errors. You can pick anyone of them.
I will suggest you to use TUNE UP UTILITIES as it perform better than much other software.
Using Ready Boost:

Connect a USB stick to a Windows computer – even on Windows 8 – and it will ask if you want to speed up your system using ReadyBoost. ReadyBoost was introduced in Windows Vista, where it was a heavily promoted feature.
Upgrade your Hardware:

It’s inevitable that upgrading to a new version of an operating system or application comes with a bit of a learning curve. With Windows 8.1, though—and its predecessor Windows 8—the curve is steep, and just finding simple tools and features can be a challenge.
Windows 8 isn’t just a new version of Windows, it’s a completely different OS in many ways, with its own unique features and conventions that may confound even the most ardent Windows users. Under the hood, most of the familiar Windows tools are still there, but they’re buried in strange places where they can’t be easily located, especially not when Microsoft took away the coveted Start button.
When Microsoft launched Windows 8.1, it solved much of the dilemma by bringing back the concept of the Start button. It is not identical in either form or function its predecessor, but it does provide simple access to a wide variety of common tools and functions.
I suggest you forget about the Start button, though. The simplest way to find anything in Windows 8 or Windows 8.1 is the Search charm.
Let’s say you want to find an app that you don’t have pinned as a tile on the Windows 8 Start screen. You can tap the arrow at the bottom left of the display to pull up the complete list of Apps. They’re sorted alphabetically by name by default, but you can also tap the arrow next to the word Apps at the upper left to reveal a dropdown list with options to sort the apps by category, most used, or date installed.
Who has that kind of time? Just open the Charms bar, tap the Search icon at the top of the charms, and start typing the name of whatever it is you’re looking for. As you type, Windows 8.1 refines and presents the results. In my experience, most apps or tools can be found within the first three or four letters.
If you’ve used Windows long enough, you’re probably familiar with the Control Panel and the tools available there. You can right-click the Start button in Windows 8.1, select the Control Panel, and then navigate through the options to find the one you’re looking for. Or, you can open the Search charm and just type “user” or “mou” to quickly jump straight to the User Accounts or Mouse settings.
Regardless of how you choose to sort the apps, you still have to sift through them to find the one you’re looking for. Depending on how many apps you have installed on your Windows 8.1 PC, that may be simple, or it could be a daunting and tedious task.
This concept isn’t unique to Windows 8.1. The Spotlight search function in Mac OS X and the search function in iOS provide a similar universal search function. There are also third-party tools like X1 Search, which can almost instantly search all of your files and content no matter where you have it stored.
Embrace the Search charm in Windows 8.1. It is your best friend, and the most convenient and efficient way to find anything you need.
Via: PCWorld

This is because, before disconnecting a device from your computer, it is essential to first prepare Windows for the change using the feature. Doing so ensures, Windows has stored any data back on the device and released the device from its hold. If you remove the device without using the Safely Remove Hardware feature, you run the risk of damaging your files and corrupting your data.
However, at times you may notice that the Eject window does not appear even after you click on the icon of the device to be removed or ejected. If you try and open “Devices and Printers” in the Control Panel, that will fail to open as well. What do you do in such situations, where the Safely Remove Hardware is not working, or the icon is missing? Try this solution, it might just work in your case, as it did in mine.
Step 1
Now right-click on the USB Dive (in my case hp USB device) and from the same location in the Properties, change the default setting and select instead Better Performance. See if this helps. Now go back to the default Quick Removal setting again. If it does, great!

rundll32 shell32.dll,Control_RunDLL hotplug.dll
Then, just hit ‘Enter’.


Twitter has evolved from its early days of tweets about what folks ate for breakfast, and for many of us it is now a valuable source of information. From breaking news to tweetversations about tech, Twitter plays an important role for some. Sadly, the limited choice of apps to work with Twitter on Windows 8 are not very good.
I am a heavy Twitter user, as the fact I am closing in on 50,000 tweets demonstrates. I am on the network all day so I have heavily tested many apps on all mobile platforms. I have favorite apps, sometimes more than one, on all platforms save Windows 8.
I don't want to pick on the Windows 8 Twitter app developers so I'm not going to point fingers at them one by one. It's sufficient to say that for me, none of them are very good. Some of them are buggy on top of that, rendering them almost unusable.There aren't a lot of Twitter apps on Windows 8 and I'm sure I've tried all of them. I find glaring problems with each of them, severe enough to make working with Twitter unpleasant on my Windows 8 tablet. Even Twitter's own app on Windows 8 is annoying, with slow operation and less than optimal design choices that make it so.
Either they don't stream updates consistently, don't handle lists well, or have direct message access poorly implemented. Some apps don't handle several of these functions well. On top of these issues, often the user interface on most of them is not simple and clean, with some odd designs that don't display lots of information at once.
I will point the finger at Twitter and its Tweetdeck web site on Windows 8. It's not the smoothest interface but it's decent, until you hold the tablet in portrait. Tweetdeck is almost unusable in portrait, making it no good on a tablet. It also doesn't handle snap view in Windows 8 very well either, another deal-breaker.
I love using my Windows tablet but this lack of good Twitter operation is making it hard to head out each day with this tablet. Both the iPad and my Android tablet serve me well on daily work outings, including Twitter use, so the Windows tablet will sit at home more often until this glaring Twitter deficiency on Windows 8 is addressed by just one good app. It's a shame as I'm finding Windows 8 to work well for me in every other way.You can access Twitter using the browser but it's not as good as using apps on the iPad and Android. Tweetbot on the iPad and Plume on Android epitomize what defines good apps that makes working with Twitter a joy. And these aren't the only ones on those platforms, there are plenty others. There is a desperate need, at least for me, for an equivalent app on Windows 8.
Via: ZDNet
Subscribe to:
Posts (Atom)


Recent Comments