 |
| Microsoft stopped support Windows XP |
Most are aware that Microsoft is soon going to end supports for Windows XP and Office 2003. There won’t be any support options, bug fixes or security updates for these Microsoft products after April 8, 2014. If you have not yet started the migration to a modern operating system, you might want to take a call on it. ‘The end of life’ is the phrase used by mark the end of automatic fixes, updates, or online technical assistance for the Windows XP System.
Press "windows" + r to open Run and type regedit to open Registry.
 |
| regedit |
Naviagate to :
 |
| HKEY_CLASSES_ROOT \ Drive \ Shell |
HKEY_CLASSES_ROOT \ Drive \ Shell
Right click on the Shell key and create a newkey and name it runas
Right-click the default key and select Edit Value, type in the Data section Defrag and confirm with OK.
Right on key runas, created in the first step, and create a new / given key name command
Right on the default key Information section and select Edit Value, type defrag% 1-v Confirm with OK.
Exit Registry and restart.
 |
| SLIMDRIVER |
Step by Step process:
Step: 1
Step: 2
Now open the Slimdriver from windows start button and click on START SCAN the software will check the hardware components and it will search for the latest hardware drivers from the manufactures website
 |
| step 2 |
Step: 3
Now the SlimDriver will list the all available hardware updates according to the hardware category now click on download update corresponding to each driver update the Slimdriver will automatically download the update from the official site
it is preferred to create a restore point( a dialogue box will appear) and then reboot your system after installing hardware update.

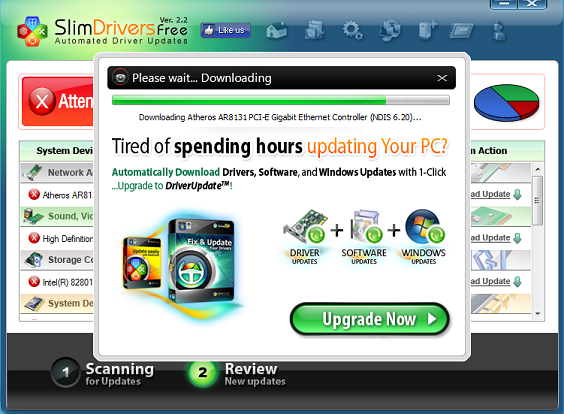
SlimDriver will be a very hand tool for those who use laptops ,where there is need to update WiFi,Bluetooth , Graphic , USB , webcams drivers it is the leading software tool under update category in CNET , Brothersoft , Softonic and many other sites .It is a free tool so our recommendation is to give it a try and see the result.
PC’s performance will slow down at 3 Instances:
- At the time of BOOTING
- During normally usage.
- While Shutting Down.
Tips to Speed Up Windows Performance:
Use a Good Antivirus:
If you are not using a Good antivirus then the chances for your PC getting infected are pretty high.In this present world of Internet nothing is safe online.As windows is the most widely used operating system,many new viruses/trojans are created daily to exploit windows os.
Removing unwanted Startup Applications:
Sometimes even after the pc starts, few programs keeps on loading thereby stopping you from performing your operations.In some cases, you might come across a strange WINDOWS error known as “Blue Screen Of death”.To avoid this you have to limit the number of startup programs.Lesser the number of startup programs greater will be the pc startup speed.
- Press” Windows key + R”(shortcut key for RUN)
- A RUN box will open .Type “Msconfig” (without quotes) in the RUN box and hit ENTER. It will take you to the “system configuration”.

- Select “START UP” from the Tab’s at the top and uncheck all the unwanted programs that you don’t want to get started along with startup. Now click “OK” and then “APPLY”.Restart the pc you will definiately notice an improvement in startup and booting speed.
Delete all the Temporary files and folders:
Windows stores some temporary files which are created while you are running any sort or applications. Deleting those Temporary files will helps you to increase your PC Performance during normal usage. Follow the steps below to delete the temporary files
- Press” Windows key + R”.
- In the RUN box type “%temp%” (without quotes) and hit enter.
 |
| Temporary Files and Folders |
- It will take you to a Folder where all the Temporary files are stored. Select and delete all the files. You may not delete all the files there, just skip those files which are undeletable.
Disk Clean Up:

Disk cleaning will delete all your temporary files from any drive of your Disk. Here is the Procedure
Press” Windows key + R”.
Type “cleanmgr” (without Quotes) and hit enter.
Select the particular Disk that you want to Clean and click on “OK” and now you can delete all the temporary files. Repeat the same procedure for all the drives and it will really free some amount of memory in every drive.
Defragment Disk:
For Defragmenting the Disk follow the steps below:
1. Right click on any drive and select PROPERTIES
2. Click on TOOLS and select DEFRAGMENT NOW
3. ANALYSE the dick first and then DEFRAGMENT it.
Delete ”Old Windows” Files:
Normally your files of OLD version of windows can be removed easily using DISK CLEAN UP. So you can follow the same procedure to delete the files of OLD WINDOWS
Reduce Files on Desktop
Move all the files on your Desktop to any other separate drive.Every shorcut on desktop consumes 20kb of your RAM.If there are too many shortcuts then it is definitely going to effect the performance speed of your computer.You can use shortcuts on the desktop for easy navigation (Shortcuts are less in memory).
Using Proper Cooling System:

Make sure that your Cooling fans are working fine. Try to clean the Dust from the surface of the fans to make it work properly. Provide good ventilation for PC’s and try to maintain the room cool so that Pc can perform better.
Removing Visual Effects:
Follow the steps below to disable unwanted Visual effects
1. Go to CONTROL PANEL > SYSTEM AND SECURITY > SYSTEM >ADVANCED SYSTEM SETTINGS ( A box will pop up)
2. Click on SETTINGS of PERFORMANCE section.
3. There check all the visual effects and remove those which are not need for your and save those settings
Deleting Internet Cache
There are many software’s available on internet to Delete internet cache but, CC Cleaner is the free software and its very effect in deleting the file temporary files.
Use Revo Uninstaller to uninstall programs:
Completely uninstall programs and applications using a program like Revo Uninstaller.
There are many Good software’s available on internet to fix all your registry errors. You can pick anyone of them.
I will suggest you to use TUNE UP UTILITIES as it perform better than much other software.
Using Ready Boost:

Connect a USB stick to a Windows computer – even on Windows 8 – and it will ask if you want to speed up your system using ReadyBoost. ReadyBoost was introduced in Windows Vista, where it was a heavily promoted feature.
Upgrade your Hardware:

This is because, before disconnecting a device from your computer, it is essential to first prepare Windows for the change using the feature. Doing so ensures, Windows has stored any data back on the device and released the device from its hold. If you remove the device without using the Safely Remove Hardware feature, you run the risk of damaging your files and corrupting your data.
However, at times you may notice that the Eject window does not appear even after you click on the icon of the device to be removed or ejected. If you try and open “Devices and Printers” in the Control Panel, that will fail to open as well. What do you do in such situations, where the Safely Remove Hardware is not working, or the icon is missing? Try this solution, it might just work in your case, as it did in mine.
Step 1
Now right-click on the USB Dive (in my case hp USB device) and from the same location in the Properties, change the default setting and select instead Better Performance. See if this helps. Now go back to the default Quick Removal setting again. If it does, great!

rundll32 shell32.dll,Control_RunDLL hotplug.dll
Then, just hit ‘Enter’.


Product Key Decryptor is a freeware that lets you recover license keys of installed applications. It carries out an automatic scan to recover the software license keys quickly. To start the license key recovery, you simply need to click on the ‘Start Recovery’ button.
Product key Decryptor supports more than over two hundred applications including most of the popular applications like Adobe Creative Studio, Camstasia Studio, Magic ISO, Norton Internet Security, Visual Studio, TuneUP Utilities, Autodesk 3ds Max, Avira Antivirus, Corel Draw, etc. It even supports license recovery of Windows OS itself and Microsoft software too, it can recover license keys for Microsoft Office, Exchange Server, SQL Server, Internet Explorer, etc.
So that you don’t lost them again, there is an option in the software, that lets you backup and save the license keys in a safer place. You can back up the recovered license key list as a TEXT, HTML or XML file and save it wherever you want. It is a very useful application and is easy to use.
Windows License Key Dump
Windows License Key Dump is the command line version of the Product Key Decryptor – from the same company. It is fit for developers and geeky users who can understand the working of command line applicationsand they can put this application to a good use. As it is the command line version of Product Key Decryptor, it supports the same applications as supported by Product Key Decryptor. To use Windows License Key Dump, you need to launch the command prompt (cmd.exe) and then navigate to the directory where the files of Windows License Key Dump are located, then you need to open ‘WindowsLicenseKeyDump.exe’ using cmd itself.Being a command line tool, Windows License Key Dump lacks the back up feature and thus you cannot save the recovered license keys. It is again a useful application but if you are a non-geek user, I would suggest you use the GUI version of this application (Product Key Decryptor).
Click here to download Windows License Key Dump.

That's the lesson in this month's web usage statistics from NetMarketShare, which measure worldwide usage share of desktop and mobile operating systems and browsers.
In October, both Microsoft and Apple released free updates to their flagship desktop and notebook operating systems. And despite the fact that the updates arrived late in the month, their impact was substantial.
Microsoft's Windows 8.1 clocked usage of 1.72 percent, doubling its share from the previous month. That gives the Windows 8.x family a total usage share of 9.25 percent after one full year on the market. (Historically speaking, it appears that Windows 8 is following the same adoption patterns as Windows XP, whose share of the installed base was also just under 10 percent after its first year on the market.)
Usage of Windows XP, which celebrated its 12th birthday in October, continues to drop precipitously in NetMarketShare's measurements as it heads toward its end-of-support date less than six months from now. For October, XP usage dropped to 31.24 percent, a new low. Windows 7 usage is virtually unchanged from the previous month, with just under half of all PCs running that flavor of Windows.
Update: Several people asked about StatCounter numbers, which were also published today. Those numbers are hard to compare, because they include mobile operating systems as well as game consoles. When I isolated the figures to just desktop OSes so they're a proper comparison to the NetMarketShare numbers, here's what I got:Meanwhile, Apple's new OS X Mavericks (officially OS X 10.9), hit a usage level of 0.84 percent in its first (partial) month of availability. Overall, OS X usage continues to climb, slowly, with all OS X versions combined reaching 7.73 percent for the month, a new high. Linux advocates can also celebrate as usage of that free alternative also hit a new high of 1.61 percent.
According to StatCounter's October numbers:
- Windows 7 has 55.3 percent usage (essentially unchanged from a year ago)
- XP has declined from 28.1 percent a year ago to just a hair over 20 percent today.
- Total usage of Windows 8.x is approximately 8.6 percent. StatCounter says between September and October usage of Windows 8.1 increased by 10X.
- OS X usage is in decline, dropping below 7 percent after being at 7.59 percent a year ago.
- Linux is at 1.16 percent.
StatCounter's browser statistics do not break out differences between mobile and desktop devices, so it is impossible to compare them to the corresponding figures from NetMarketShare.
NetMarketShare still doesn't register any share from Chrome OS. StatCounter says Chrome OS usage is now approximately 4/100 of 1 percent.
In the desktop browser segment, Internet Explorer continues its steady growth, reaching 58.22 percent usage. That's the highest level of usage for the Internet Explorer family in more than two years, and it comes as usage of Firefox and Chrome on traditional desktop operating systems continue to slide. According to the NetMarketShare numbers, Chrome usage hit a two-year low of 15.42 percent in October after briefly nearing the 20 percent mark earlier in the year.
The PC market is no longer growing as it once was, but even with lower shipments the installed base of traditional PCs continues to grow, with hundreds of millions of new shipments per year. For consumers (and increasingly for businesses), tablets and mobile devices are where the market momentum and excitement are to be found. But in most cases those new tablets are still going to be companion devices in households and offices that also have at least one PC or Mac.It's worth noting that the modern, standards-compliant versions of Internet Explorer, 10 and 11, combined for a total usage of 20.43 percent for the month. That's more than the Firefox or Chrome figures. And Internet Explorer 10, which doesn't run on Windows XP, is poised to overtake IE 8 as the most-used version.
Problem Steps Recorder is a great solution to get a detailed description of the problem, so that you can either review the report yourself or send it to a tech support team. Basically, this tool records everything happening on the computer that needs troubleshooting. It records all mouse clicks and everything that is pressed on the keyboard, takes screenshots, and then saves the report as a zipped MHTML file. This file can be easily emailed and analyzed. To enable Problem Steps Recorder, click on Start, type PSR and hit Enter. Then click on Start Record. To save a report, just stop recording your computer activity.
2. Troubleshoot problems
If something in Windows 7 starts behaving in a weird way and you have no idea why, go to the Control Panel, locate the “Find and fix problems” (Troubleshooting) option and you’ll be able to access the Windows 7 troubleshooting tools. They are easy-to-use wizards and can fix common problems, clean your system, check your settings, and lots more.
3. Discover bottlenecks
Under normal circumstances, Windows 7 easily outperforms Vista and XP. Nevertheless, your computer can still seem too slow from time to time. Most likely it’s an application or a process that’s slowing you down. Windows 7 makes it really easy to find bottlenecks with the help of Resource Monitor. Just click on Start, type RESMON and hit Enter to launch the tool. When it opens, click on the CPU, Memory, Disk and Network tabs to see which processes are hogging your system and using up your bandwidth. When you find the process that’s holding you back, you’ll be able to try to fix it right from the Resource Monitor. For example, if a process is locked up, right-click on it and select Analyze to see where the problem lies.
4. Repair your computer
If something goes seriously wrong and Windows 7 fails to start, it might be possible to repair your computer without the installation CD. Just boot your PC and press F8 during startup. You should see an option called Repair Your Computer. Select it and press Enter to see the recovery options Windows 7 has to offer.
These Windows 7 tools will help you troubleshoot and fix a slow computer in a quick and easy way. To prevent your computer from slowing down, use maintenance utilities like disk cleanup and defrag to keep your PC in top shape
.
Subscribe to:
Posts (Atom)


Recent Comments